

How To Install Mysql Server In Ubuntu 18.04 Using Terminal
This commodity will nowadays the step-past-step installation process of the MySQL server on Ubuntu. For demonstration purposes, I created a virtual car using Oracle VM virtual box and set Ubuntu 18.04 on the virtual box. Information technology's important to notation that this guide is suitable for installation on all versions of Ubuntu. I'd recommend you referring to the article Creating a Virtual Motorcar with Oracle VM Virtual Box for a better understanding of the installing process and creating a virtual auto on Oracle VM virtual box. Also, you may plough to the article How to Install Ubuntu 18.04 for more than information well-nigh installing Ubuntu eighteen.04 on the virtual machine.
Install MySQL eight.0 on Ubuntu using PuTTY
The question of how to install MySQL in Ubuntu has a simple respond. Nosotros are going to use the PuTTY software to connect to Ubuntu Linux. If you don't take information technology installed, get the software from the official page.
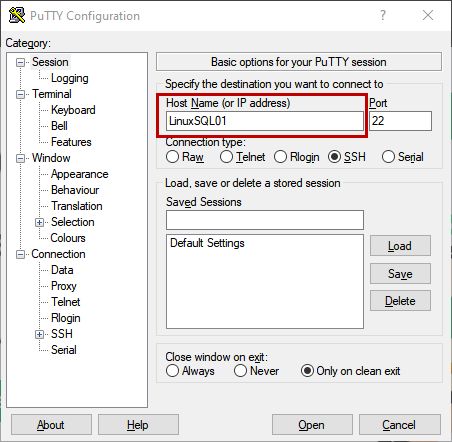
Launch PuTTY, specify the hostname, and click Open up .
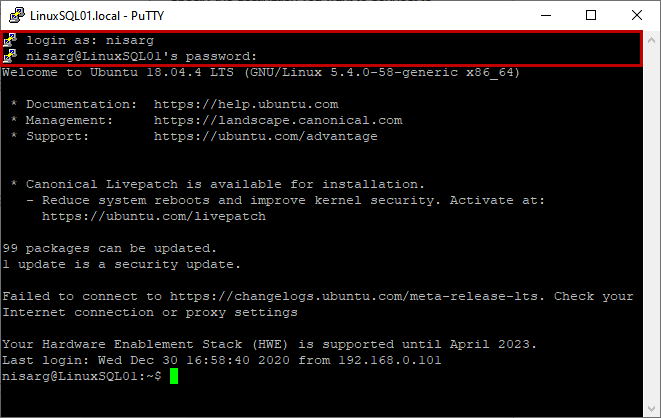
PuTTY prompts for the username and password. Specify these details and hit Enter .
Once we are connected to Linux, connect to the root user by executing the below command:
[electronic mail protected]:~$ sudo -i 
Before nosotros get to install MySQL Server in Ubuntu, nosotros must update the Ubuntu repository. Execute the following command:
[email protected]:~# sudo apt-get update As soon as the repository is updated, we use the wget control to download the latest package of the MySQL Server from MySQL APT Repository:
[email protected]:~# wget -c https://dev.mysql.com/get/mysql-apt-config_0.8.xv-1_all.deb After we download it, execute the beneath command to install the MySQL package:
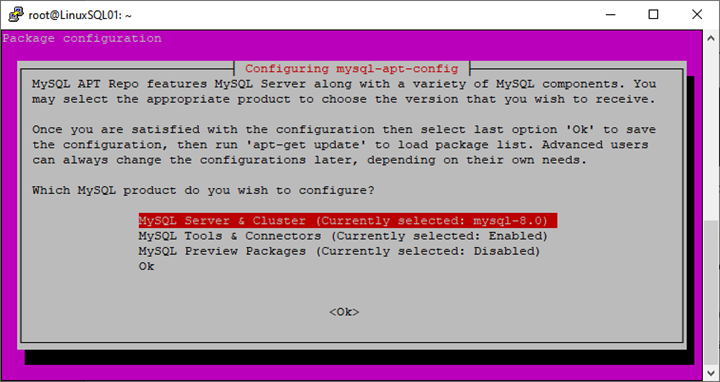
[email protected]:~# sudo dpkg -i mysql-apt-config_0.viii.xv-1_all.deb The MySQL package configuration wizard opens. On the starting time screen, you can view the MySQL products listing yous tin can install with that wizard – any of the following MySQL servers or components:
- MySQL 5.7
- MySQL 8.0
- MySQL Cluster vii.5
- MySQL Cluster 7.half-dozen
- MySQL Cluster viii.0
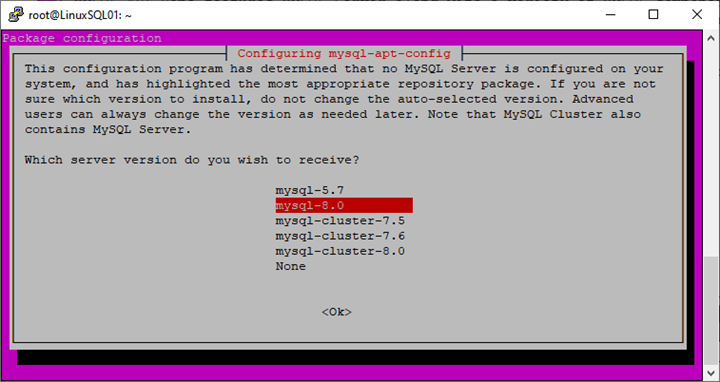
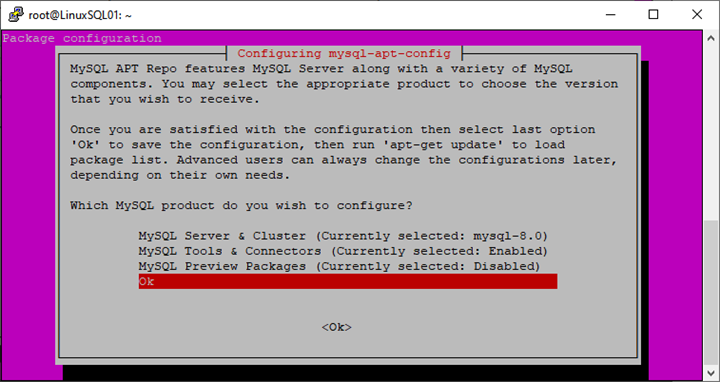
If you want to change the electric current pick of MySQL, hit Enter on the first option:
View the list of the MySQL Server versions. We desire to install MySQL 8.0, so cull mysql-8.0 and hit Enter .
Back to the first screen of the Magician, select OK by pressing the down the arrow primal and hit Enter .
The latest repository of MySQL 8.0 has been installed.
At present, run the following command to update the repositories:
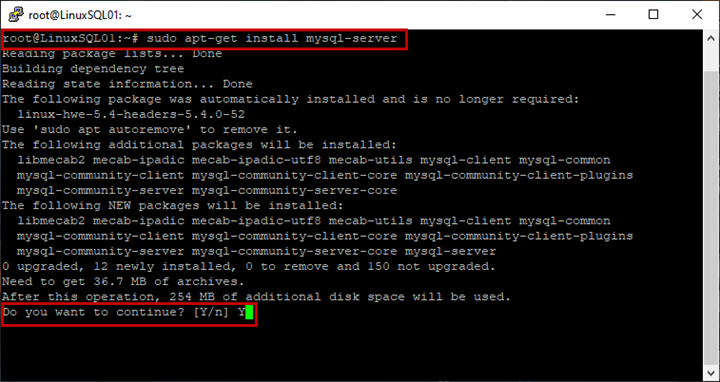
[e-mail protected]:~# sudo apt-get update When the process is complete, run the following command to install MySQL 8.0:
[electronic mail protected]:~# sudo apt-get install mysql-server The installer shows the corporeality of infinite to be utilized and prompts for confirmation. Printing Y and hit Enter .
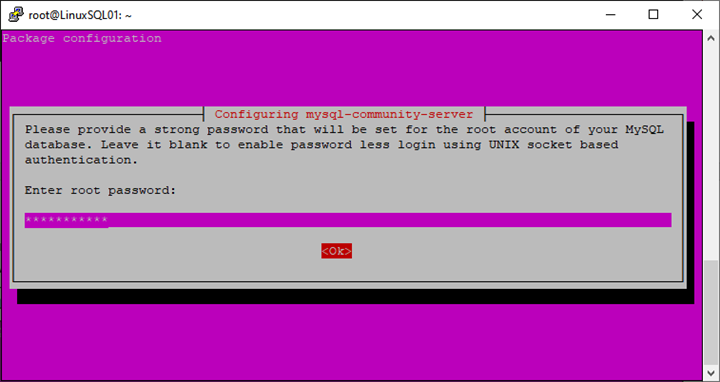
The installation process continues. On the adjacent screen, the installer prompts to enter the root password. Specify the appropriate password and hit Enter .
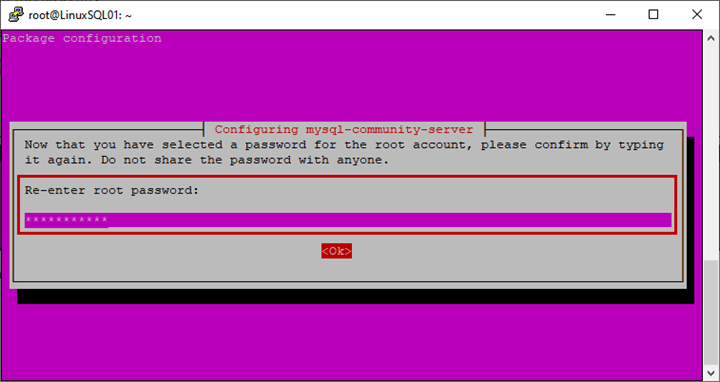
Proceed to the next screen, re-enter the root countersign, and striking Enter .
MySQL 8.0 uses improved SHA256 password authentication. Equally we are working with MySQL 8.0, we must update the client connectors and other components. More than details are provided on the screen of the installer – review them and hit Enter .
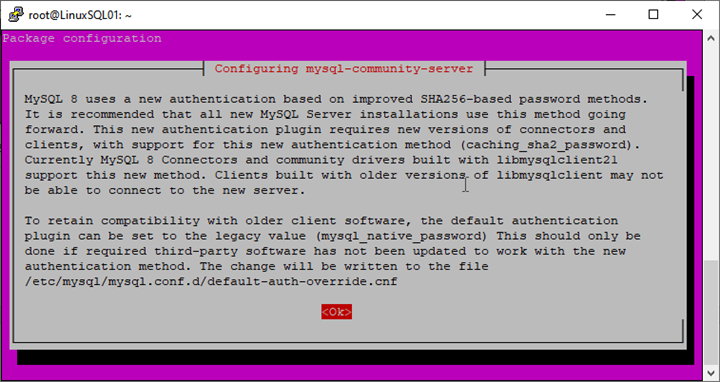
Adjacent, yous tin choose the default authentication method to exist used by MySQL 8.0. Nosotros are not updating the client components, and so choose Utilize Legacy Authentication Method and hit Enter .
The installation continues.
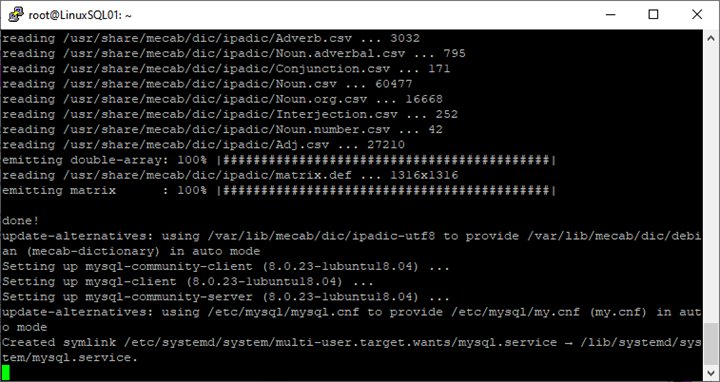
When the installation completes, yous can view the status of the MySQL service by executing the post-obit command:
[e-mail protected]:~# service mysql condition Output:

Equally you can see, MySQL services are running. Now, let us connect to MySQL Server and run some queries.
Connect to the MySQL Server
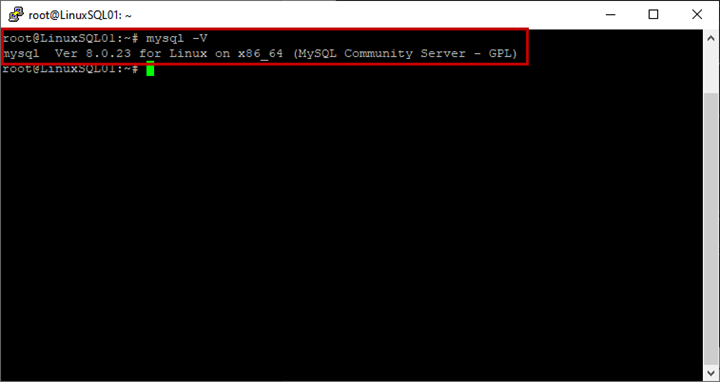
Showtime, we check the MySQL Server version past executing the following command:
[email protected]:~# mysql -Five Output:
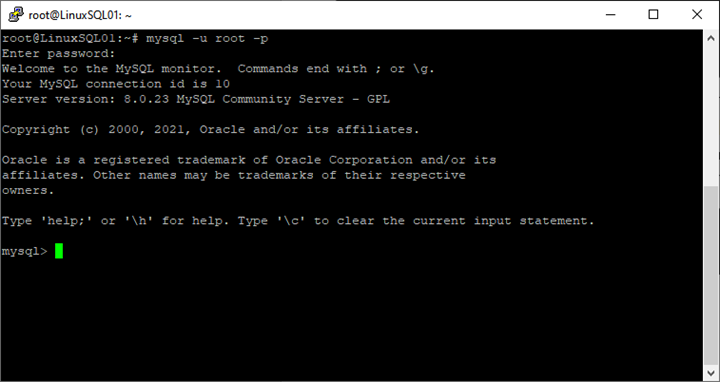
Run the following control to connect to MySQL Server:
[email protected]:~# mysql -U root -p The command prompts for the password of the root user. Specify it and hit Enter .

The connexion has been established successfully:
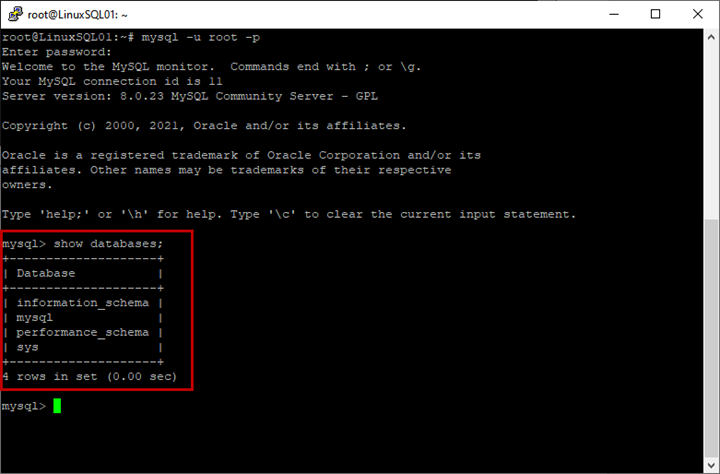
Let us see the listing of the databases – run the following query:
mysql> show databases; Output:
That's how we can successfully install MySQL on Ubuntu eighteen.04. In the aforementioned way, yous tin can install MySQL in Ubuntu 16.04. If you need to install MySQL in Ubuntu 16.04, these tips are of nifty assist, too.
Install MySQL 8.0 on Ubuntu using Debian Package managing director
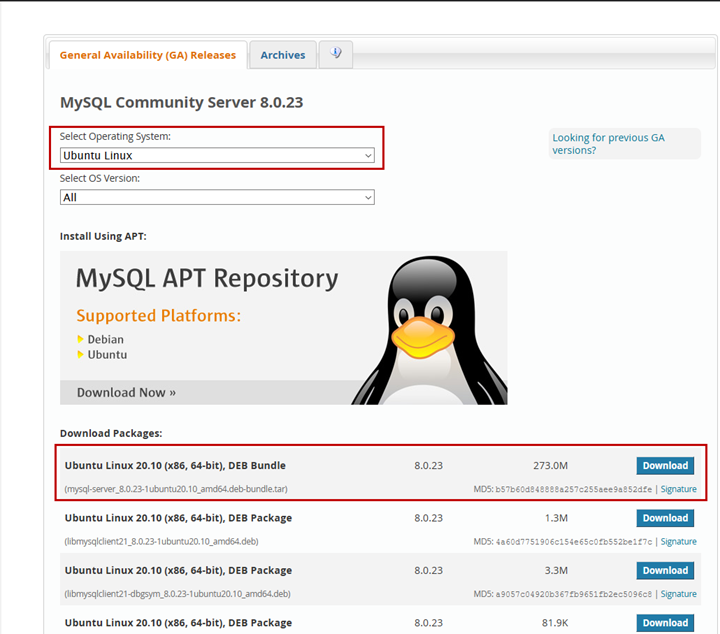
To install MySQL 8.0 using the Debian package manager, you must showtime download the MySQL 8.0 packet. Open the MySQL Customs Downloads page and select Ubuntu Linux from the drop-down carte. It will brandish the listing of packages. We will install the entire package with all tools.
Click download opposite to the Ubuntu Linux 20.10 (x86, 64bit), Deb bundle.
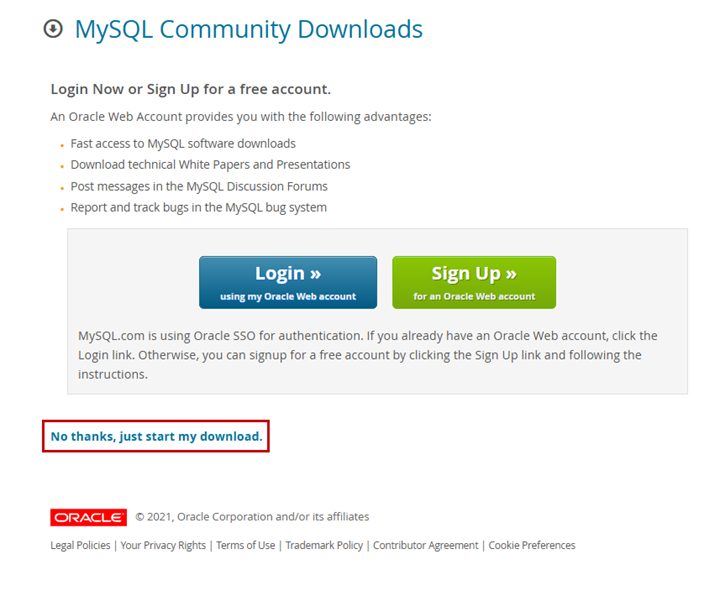
The Oracle web account login page opens. If you have signed upwards for the oracle account, provide relevant login details and download the package. Nosotros are non using any Oracle web business relationship. Thus, click on the commencement my download link.
The download process begins. One time it is over, we begin the installation.
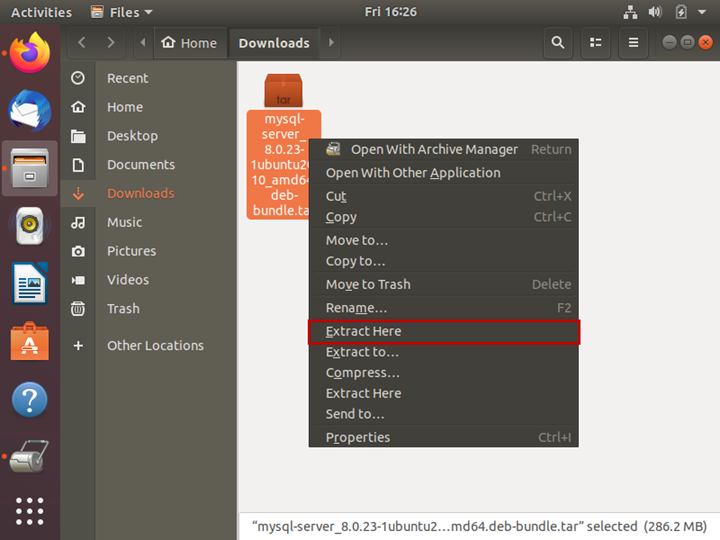
First, we must excerpt files from the tar file that contains various Debian packages for installing MySQL client tools and community servers. To practice that, right-click on the mysql-server-8.0.23..tar file > Extract .
When the files are extracted, we first install libaio1 library. Execute the following command:
[electronic mail protected]:~# sudo apt-go install libaio1 Output:
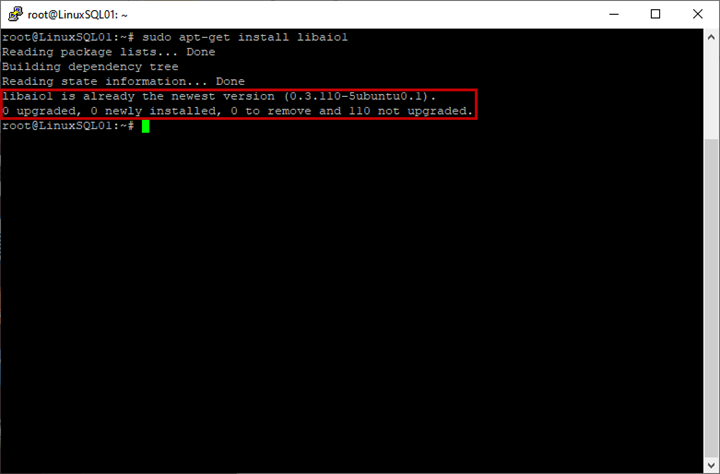
Equally you tin encounter, the bundle is already installed. At present, preconfigure the MySQL bundle past executing the post-obit command:
[email protected]:~# sudo dpkg-preconfigure /dwelling/nisarg/Downloads/mysql-server_8.0.23-1ubuntu20.10_amd64.deb-package/mysql-customs-server_*.deb This manner, we start installing MySQL 8.0. The installation steps are like the installation process done by the MySQL APT repository, as described in this article before.
Once the installation process completes, yous tin can view MySQL server services by running the following control:
[email protected]:~# service mysql status Output:

Every bit you lot can see, MySQL services are running.
Summary
This article explained the stride-by-step process of installing MySQL Server 8.0 on Ubuntu Linux. For that, we tin utilise PuTTY or Ubuntu software manager. You cull the method that suits y'all best, and I hope that it will make your work smoother.
(Visited 298 times, 2 visits today)
Tags: linux, mysql, ubuntu Last modified: September 17, 2022

Source: https://codingsight.com/quick-guide-on-installing-mysql-on-ubuntu/
Posted by: wilsonfroce1940.blogspot.com
0 Response to "How To Install Mysql Server In Ubuntu 18.04 Using Terminal"
Post a Comment